#  Hexapod
A Hexapod Robot using Raspberry Pi Zero W
[
Hexapod
A Hexapod Robot using Raspberry Pi Zero W

[ ](https://play.google.com/store/apps/details?id=com.rookiedev.hexapod)
[
](https://play.google.com/store/apps/details?id=com.rookiedev.hexapod)
[ ](https://github.com/rookiepeng/hexapod/releases)
[
](https://github.com/rookiepeng/hexapod/releases)
[ ](https://github.com/rookiepeng/hexapod/releases)
## Introduction
This is a hexapod robot based on [Smallp Tsai](https://github.com/SmallpTsai)'s [hexapod-v2-7697](https://github.com/SmallpTsai/hexapod-v2-7697) project.
This project reused most of the mechanical design in the original project, but with a full redesign of the circuits and software.
The table below shows the difference between this project and the original one.
| | Original hexapod-v2-7697 | This project |
| --------------- | ------------------------ | ----------------------------------------------- |
| Controller | Linkit 7697 | Raspberry Pi Zero W or Raspberry Pi Zero W 2 |
| PWM control | Custom circuit board | 2 x PCA9685 motor driver boards |
| DC-DC | 7 x mini360 modules | 2 x XL4005 5A Max DC-DC modules and 1 x mini360 |
| Power | 2S Lipo battery | 2 x 18650 batteries |
| Remote | BLE | WiFi, Bluetooth |
| Remote software | Android and iOS | PC, Android |
https://user-images.githubusercontent.com/471808/148647807-02e3e901-6181-4473-8ac4-3b5998fa8d17.mp4
https://user-images.githubusercontent.com/471808/158099495-1caeb903-a2e6-4e8d-9f13-54728d7d255a.mp4
## Software
### Raspberry Pi
#### Requirements
Raspberry Pi is running [`Raspberry Pi OS`](https://www.raspberrypi.com/software/).
- Enable `I2C` through `raspi-config`
``` bash
sudo raspi-config
```
- Install required packages
``` bash
sudo apt-get install python3-numpy python3-pip
```
- Install required Python modules
``` bash
pip3 install adafruit-circuitpython-servokit
```
> Tips: It is convenient to debug code on Raspberry Pi through VSCode's remote feature.
#### Running
The hexapod program, located under `./software/raspberry pi/`, is written in Python. Use the following command to start it manually.
``` bash
python3 hexapod.py
```
### Android
](https://github.com/rookiepeng/hexapod/releases)
## Introduction
This is a hexapod robot based on [Smallp Tsai](https://github.com/SmallpTsai)'s [hexapod-v2-7697](https://github.com/SmallpTsai/hexapod-v2-7697) project.
This project reused most of the mechanical design in the original project, but with a full redesign of the circuits and software.
The table below shows the difference between this project and the original one.
| | Original hexapod-v2-7697 | This project |
| --------------- | ------------------------ | ----------------------------------------------- |
| Controller | Linkit 7697 | Raspberry Pi Zero W or Raspberry Pi Zero W 2 |
| PWM control | Custom circuit board | 2 x PCA9685 motor driver boards |
| DC-DC | 7 x mini360 modules | 2 x XL4005 5A Max DC-DC modules and 1 x mini360 |
| Power | 2S Lipo battery | 2 x 18650 batteries |
| Remote | BLE | WiFi, Bluetooth |
| Remote software | Android and iOS | PC, Android |
https://user-images.githubusercontent.com/471808/148647807-02e3e901-6181-4473-8ac4-3b5998fa8d17.mp4
https://user-images.githubusercontent.com/471808/158099495-1caeb903-a2e6-4e8d-9f13-54728d7d255a.mp4
## Software
### Raspberry Pi
#### Requirements
Raspberry Pi is running [`Raspberry Pi OS`](https://www.raspberrypi.com/software/).
- Enable `I2C` through `raspi-config`
``` bash
sudo raspi-config
```
- Install required packages
``` bash
sudo apt-get install python3-numpy python3-pip
```
- Install required Python modules
``` bash
pip3 install adafruit-circuitpython-servokit
```
> Tips: It is convenient to debug code on Raspberry Pi through VSCode's remote feature.
#### Running
The hexapod program, located under `./software/raspberry pi/`, is written in Python. Use the following command to start it manually.
``` bash
python3 hexapod.py
```
### Android
 ### PC
PC program source files are located under `./software/pc/`. The compiled program can be downloaded under the [release](https://github.com/rookiepeng/hexapod/releases) page.
### PC
PC program source files are located under `./software/pc/`. The compiled program can be downloaded under the [release](https://github.com/rookiepeng/hexapod/releases) page.
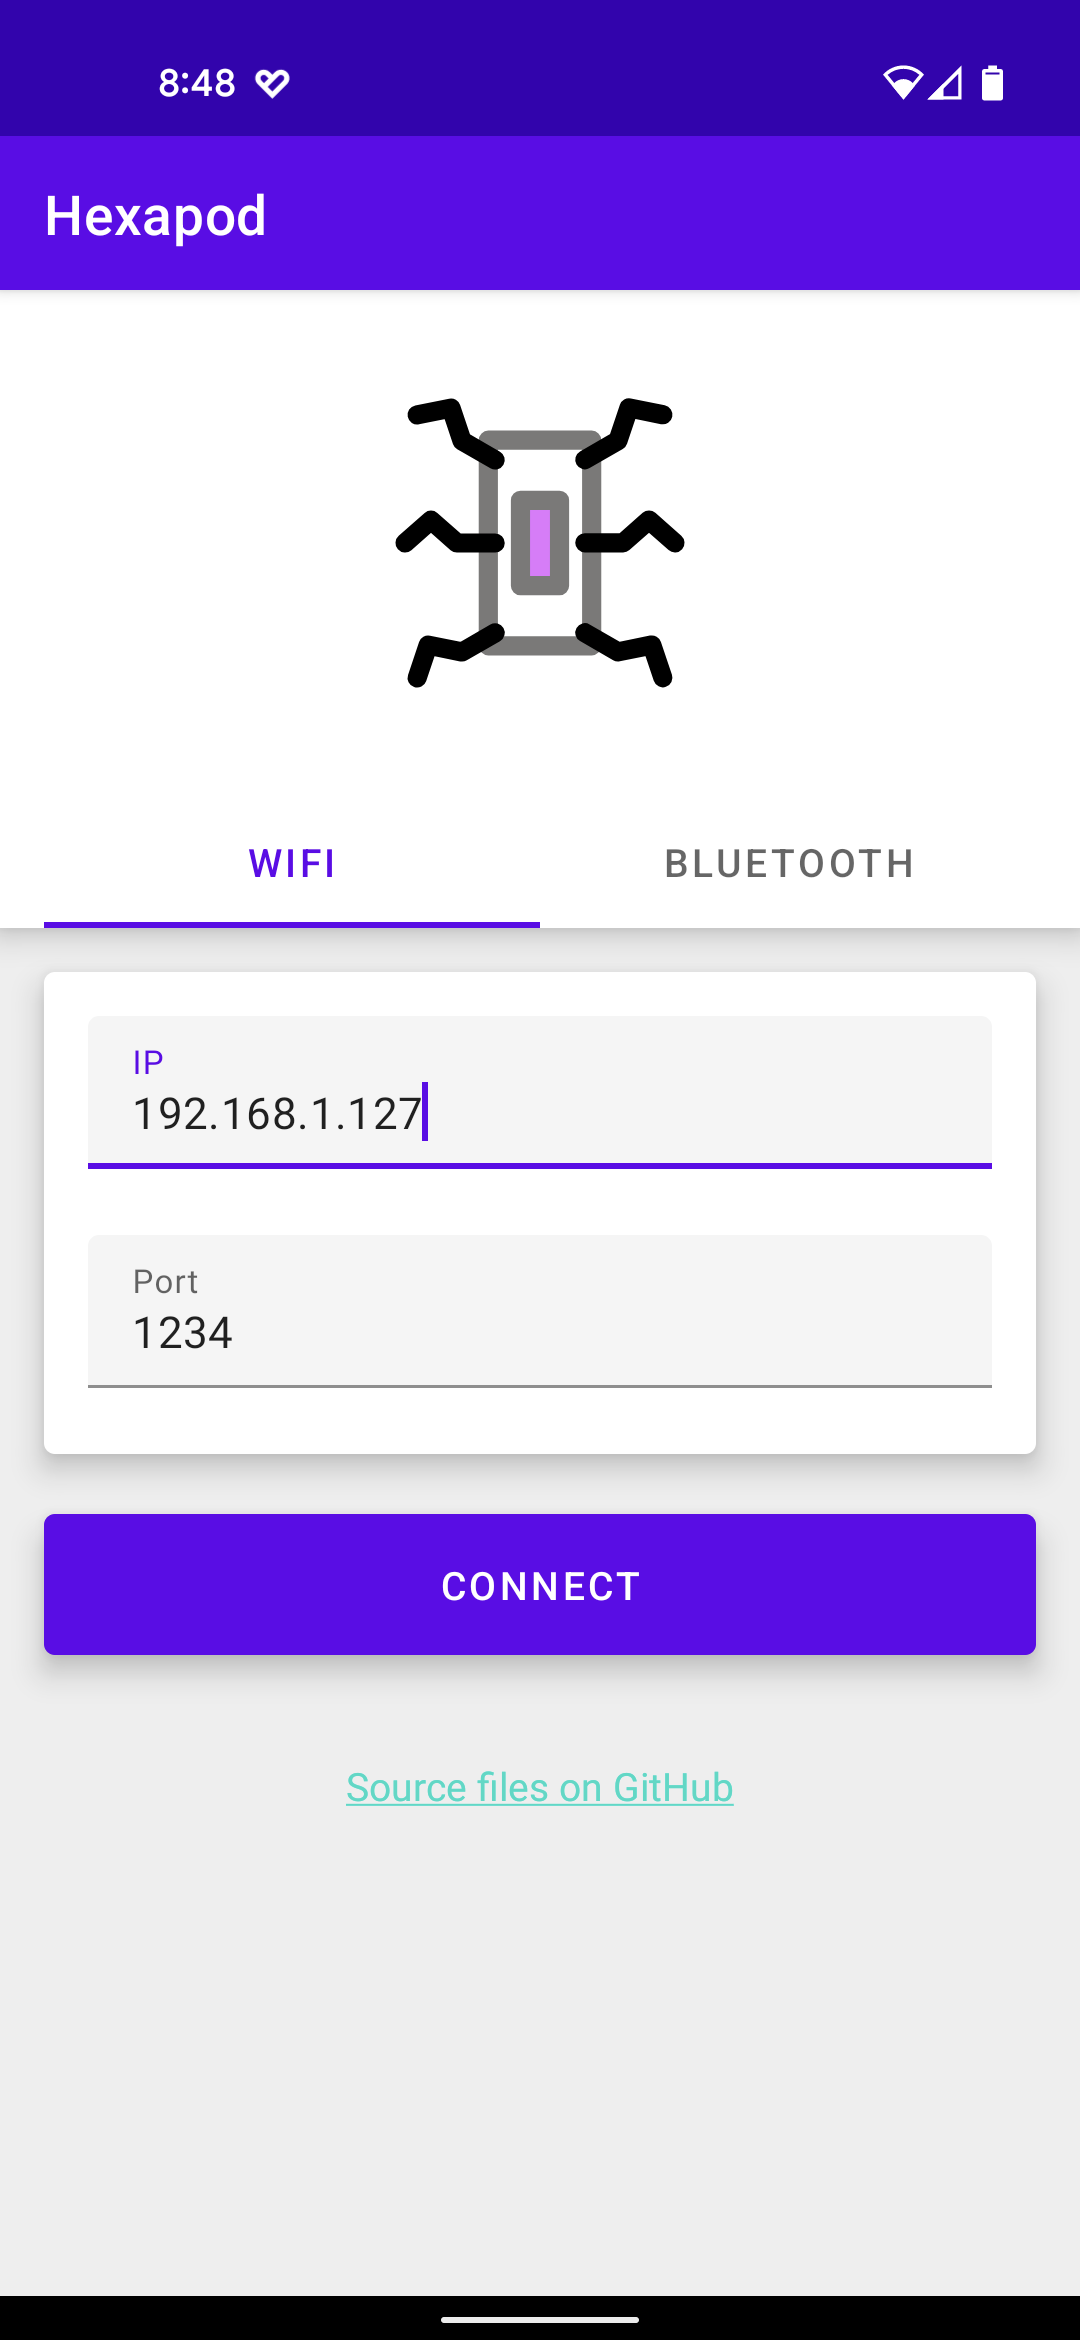
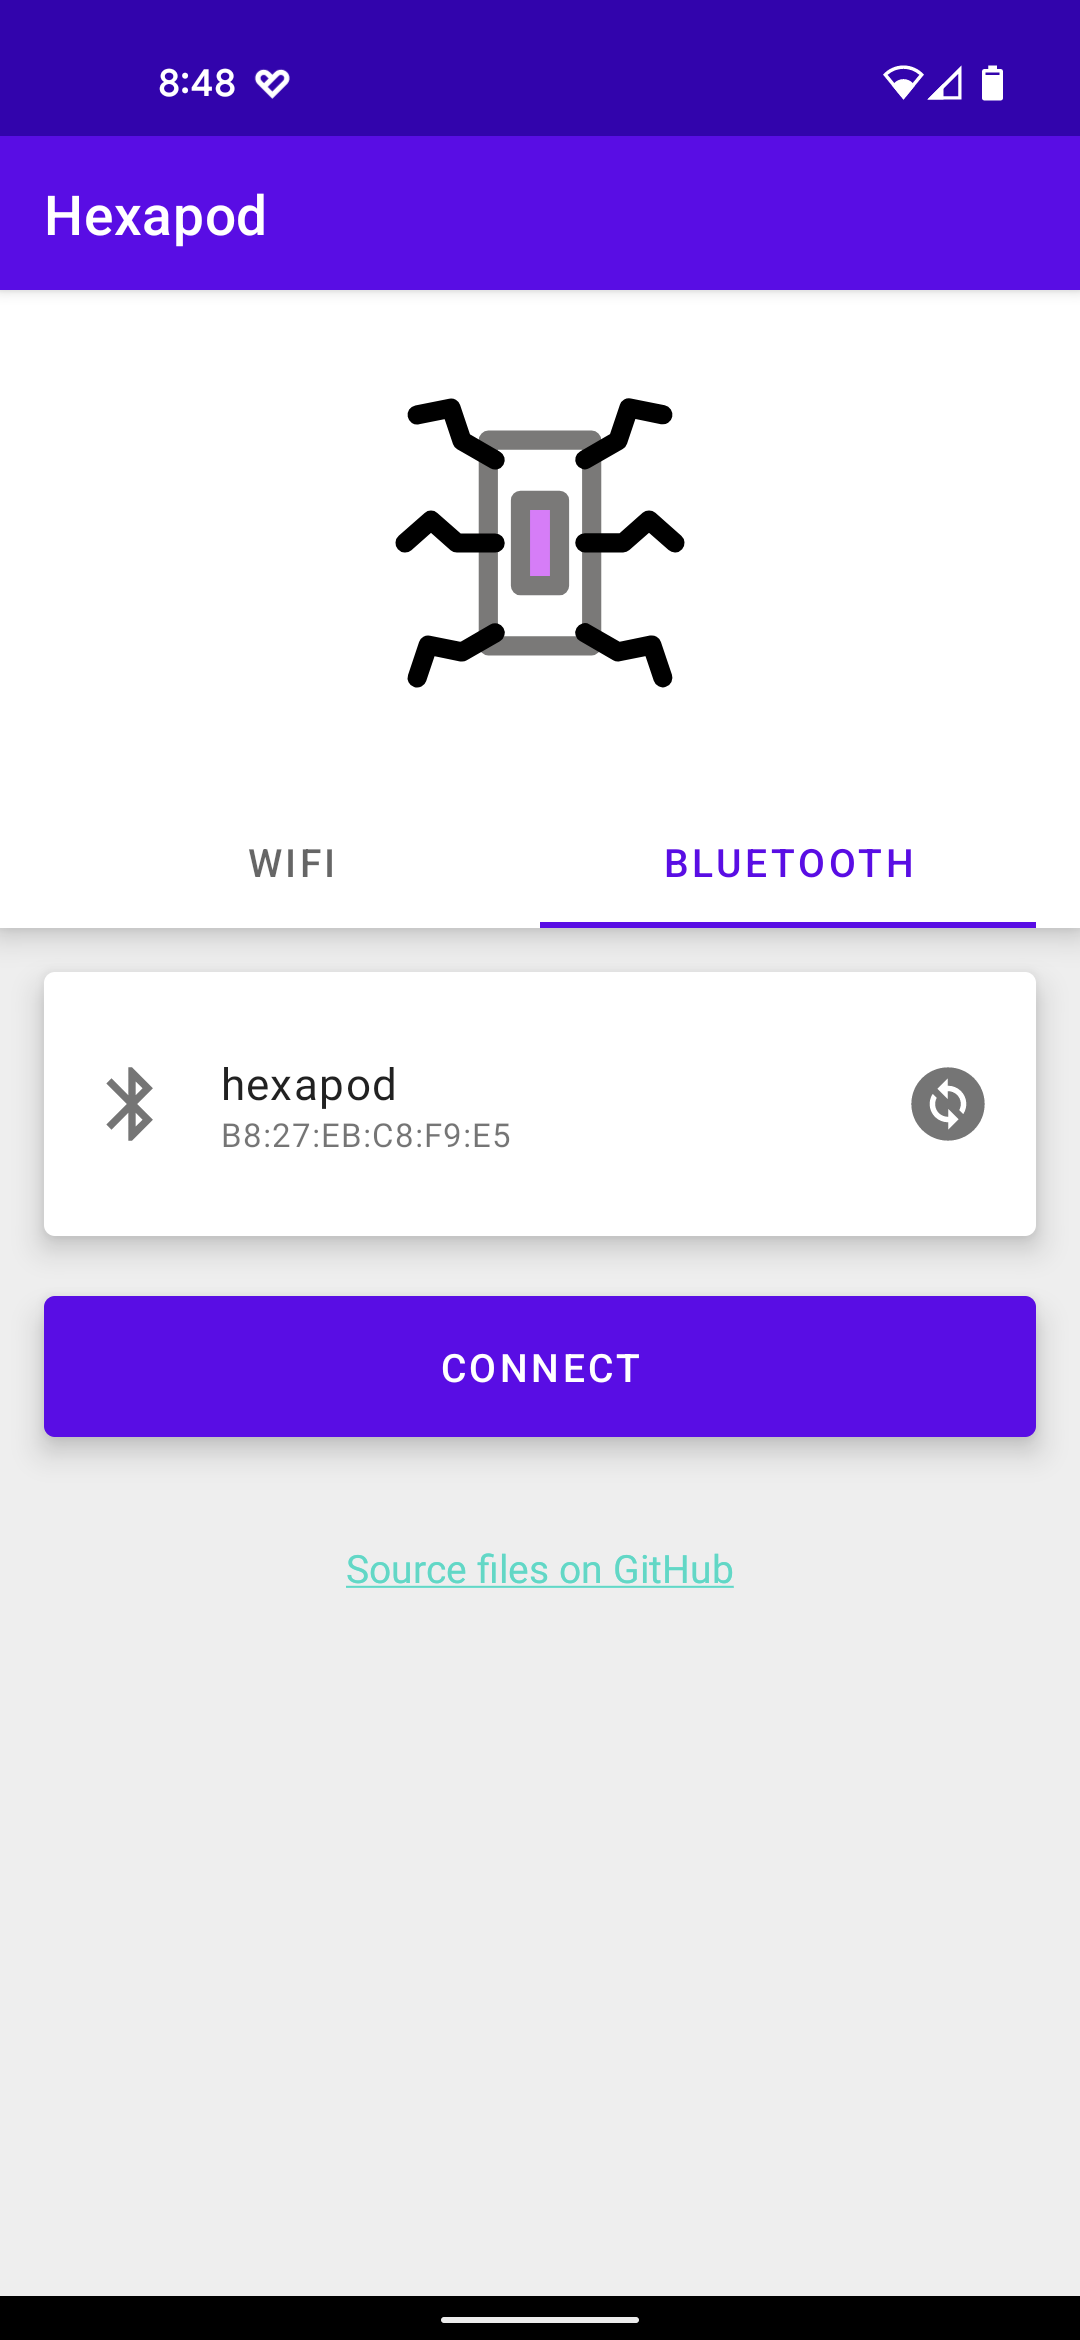
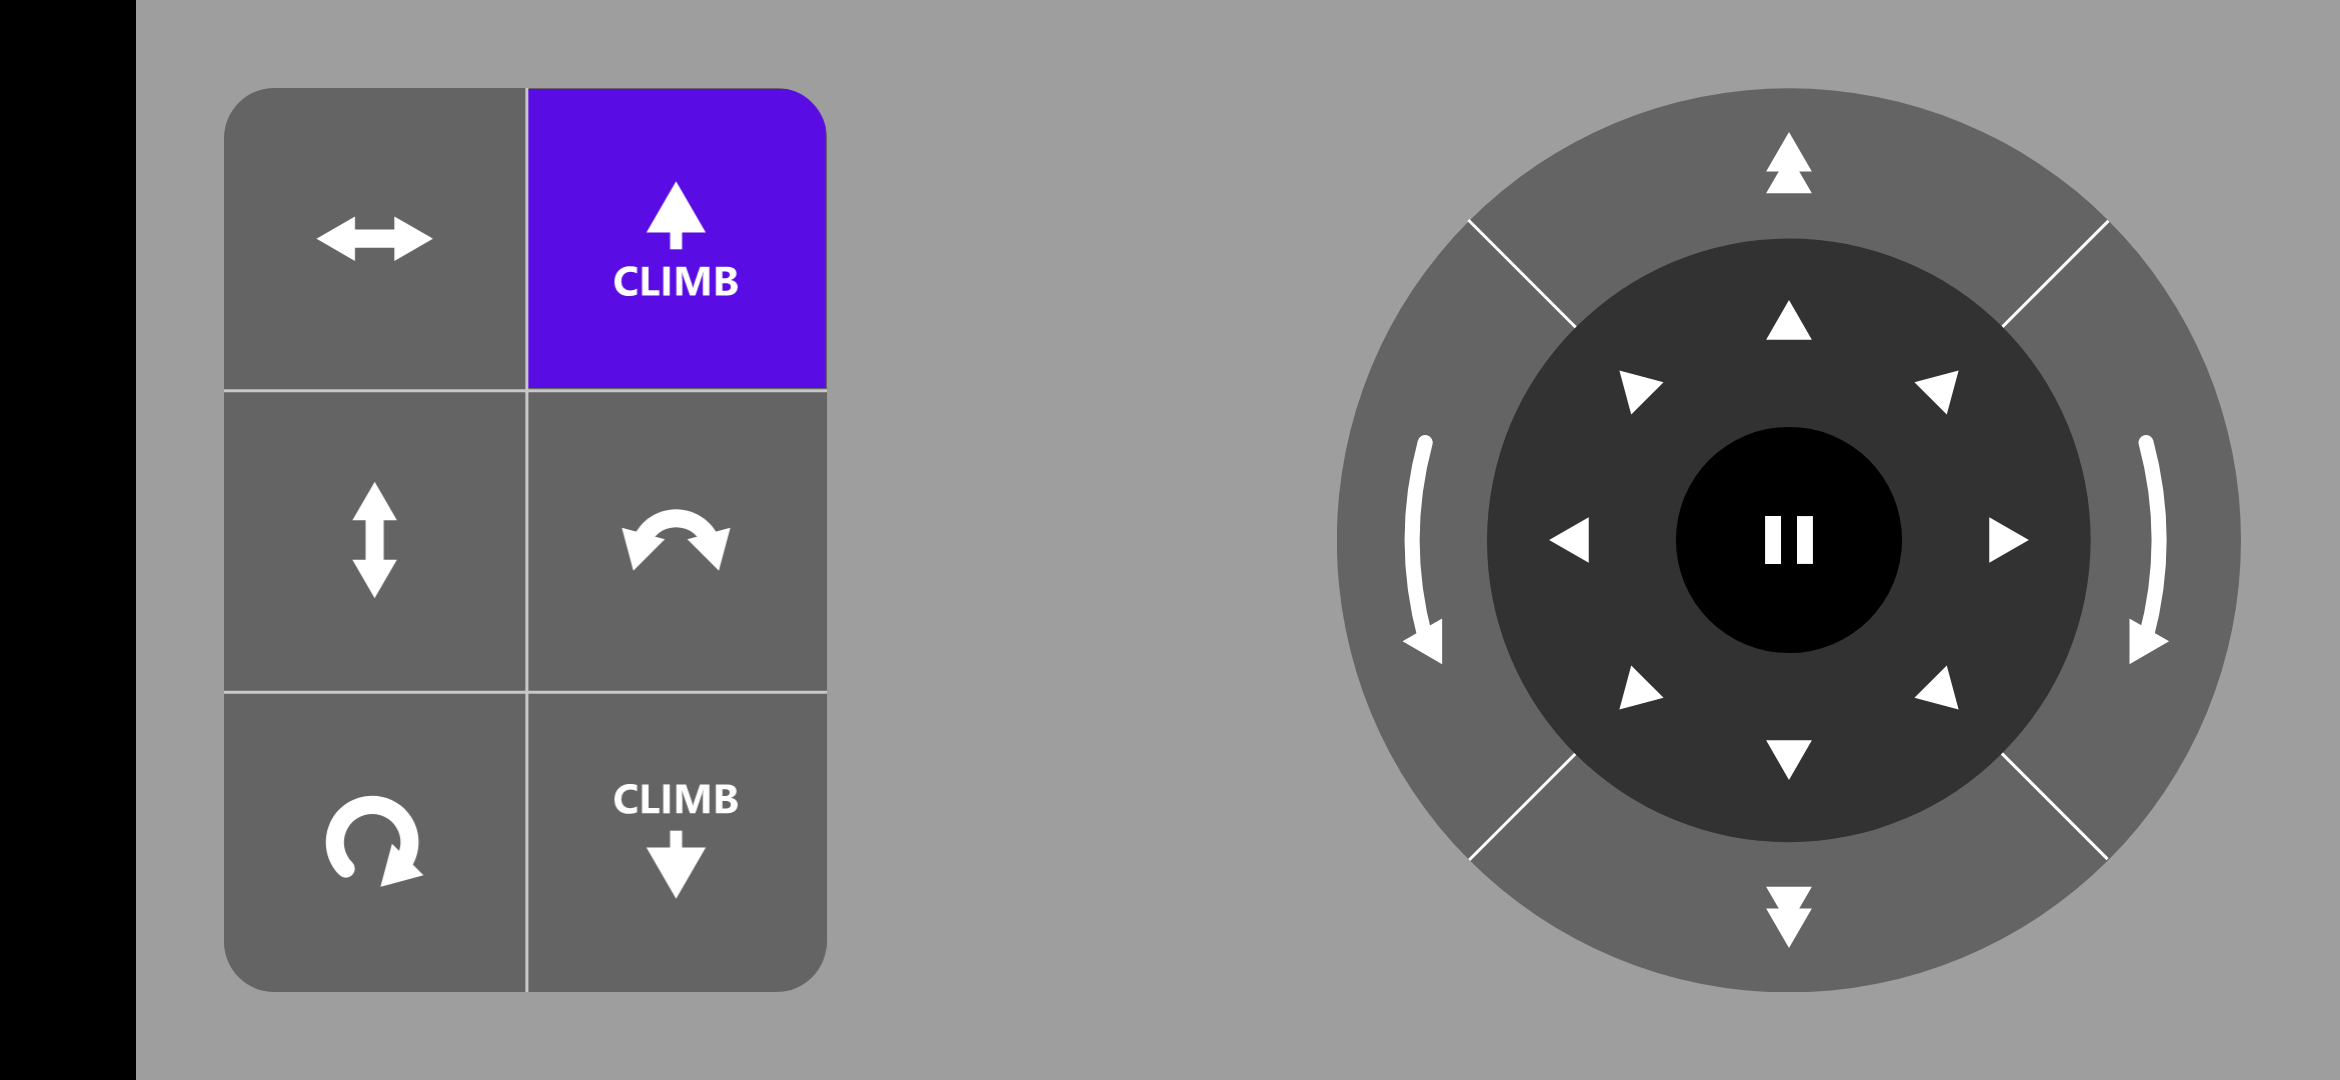
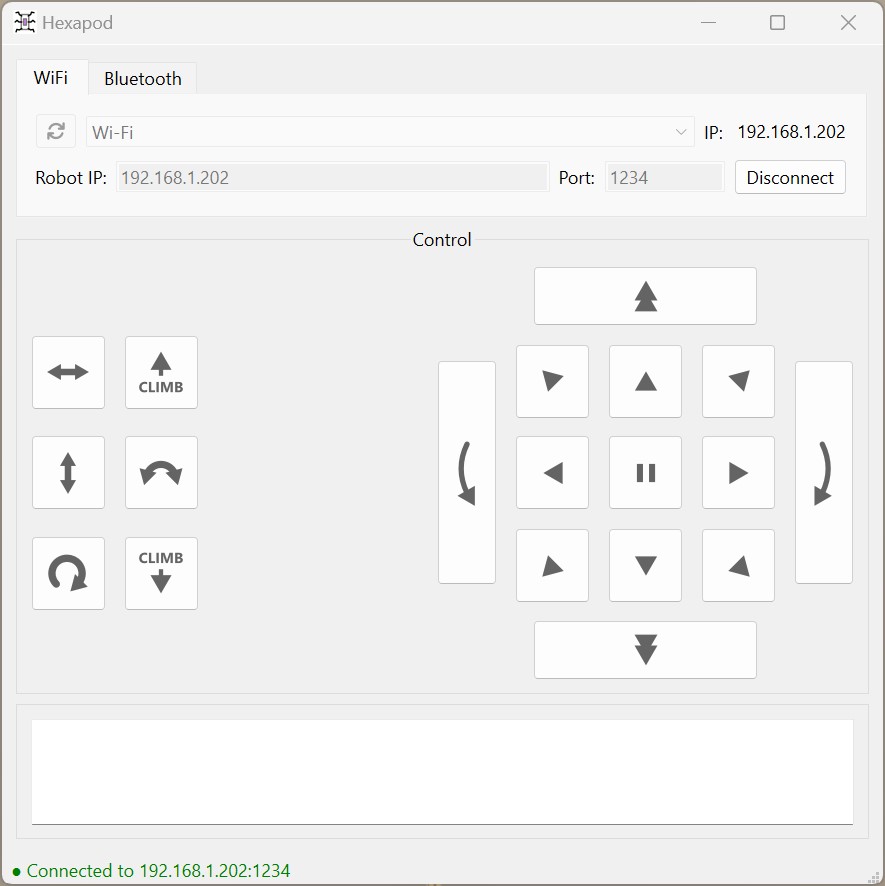 - Find the correct IP address of the Raspberry Pi on the hexapod
- Connect to the hexapod using the IP address
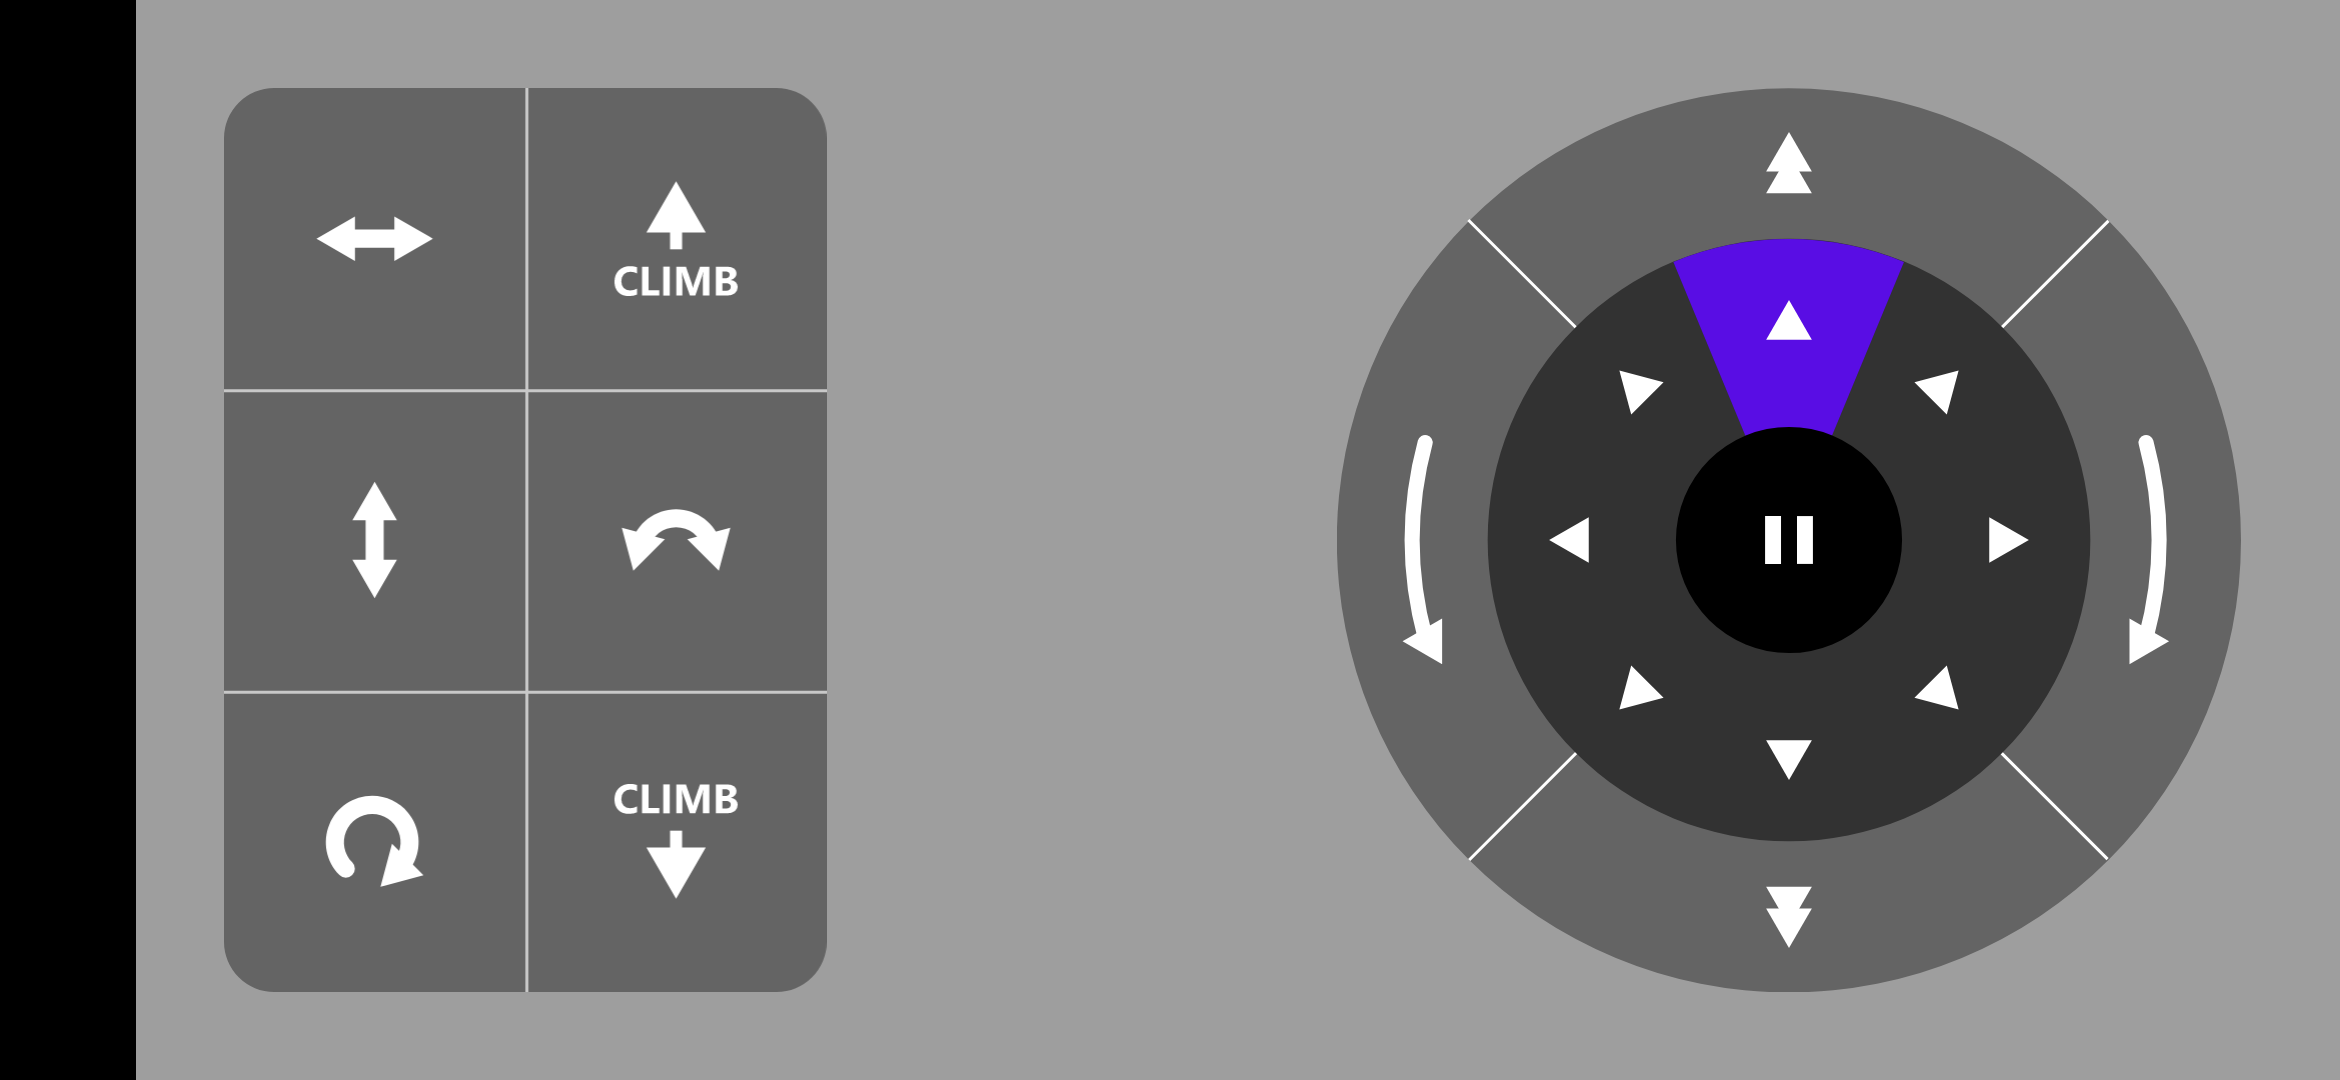
- Use the buttons on the panel to control the hexapod
## Mechanism
### Bill of Materials (BOM)
#### Servos
18 TowerPro [MG92B](http://www.towerpro.com.tw/product/mg92b/) are required.
> The dimension of 3d printed part is highly dependent on the servo's size. Modification is required if you want to use alternative servos.
#### 3D-Printed Parts
##### Body x 1
| Filename | Thumbnail | Required |
| -------------- | ----------------------------------------------------------------------- | -------- |
| body_top |
- Find the correct IP address of the Raspberry Pi on the hexapod
- Connect to the hexapod using the IP address
- Use the buttons on the panel to control the hexapod
## Mechanism
### Bill of Materials (BOM)
#### Servos
18 TowerPro [MG92B](http://www.towerpro.com.tw/product/mg92b/) are required.
> The dimension of 3d printed part is highly dependent on the servo's size. Modification is required if you want to use alternative servos.
#### 3D-Printed Parts
##### Body x 1
| Filename | Thumbnail | Required |
| -------------- | ----------------------------------------------------------------------- | -------- |
| body_top | 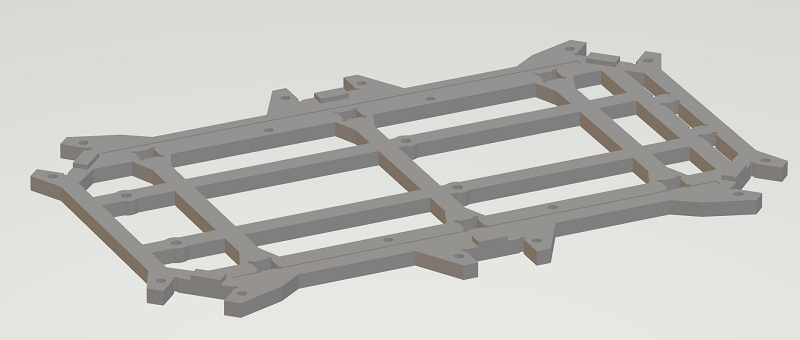 | 1 |
| body_bottom |
| 1 |
| body_bottom | 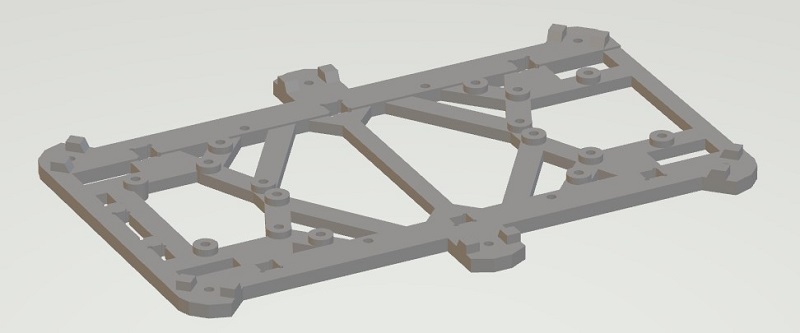 | 1 |
| body_side_wall |
| 1 |
| body_side_wall |  | 2 |
| body_back_wall |
| 2 |
| body_back_wall | 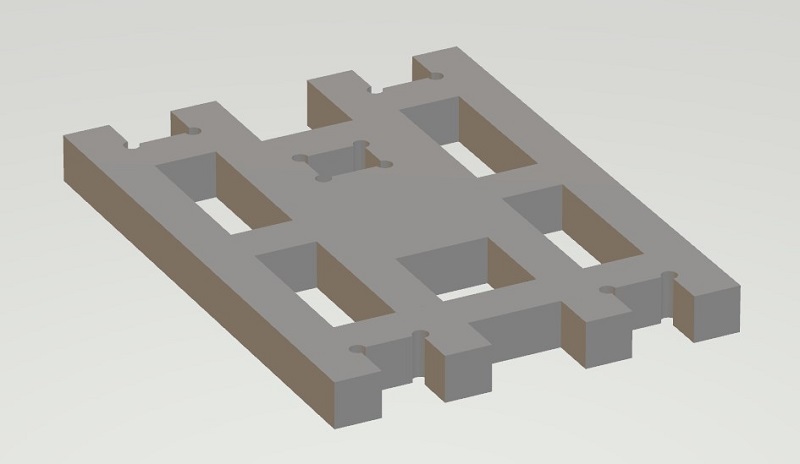 | 1 |
| battery_box |
| 1 |
| battery_box |  | 1 |
| battery_holder |
| 1 |
| battery_holder | 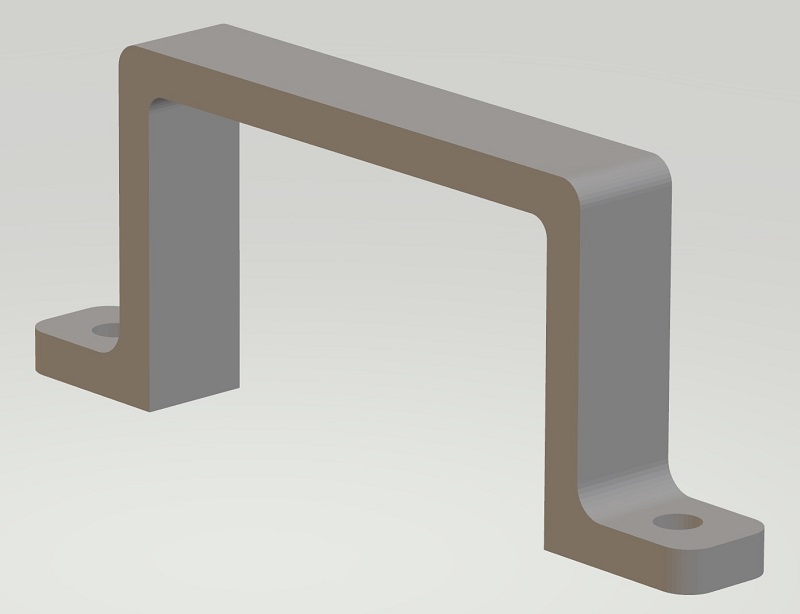 | 2 |
##### Leg x 6
| Filename | Thumbnail | Required |
| --------------- | ------------------------------------------------------------------------- | -------- |
| thigh_top |
| 2 |
##### Leg x 6
| Filename | Thumbnail | Required |
| --------------- | ------------------------------------------------------------------------- | -------- |
| thigh_top | 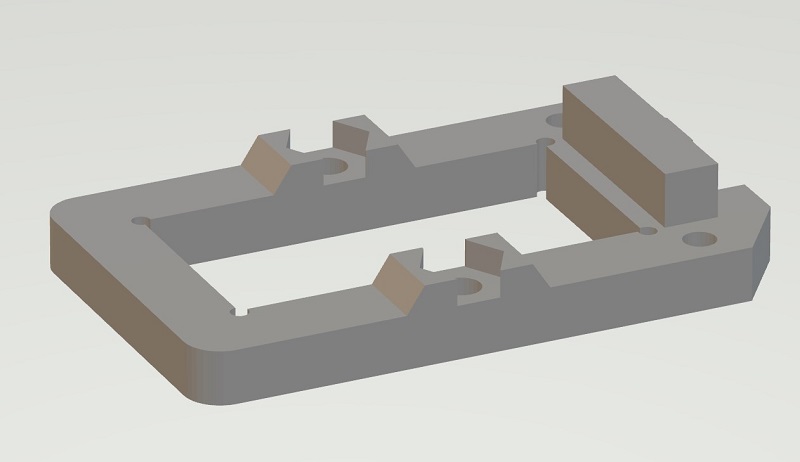 | 1 (x6) |
| thigh_bottom |
| 1 (x6) |
| thigh_bottom | 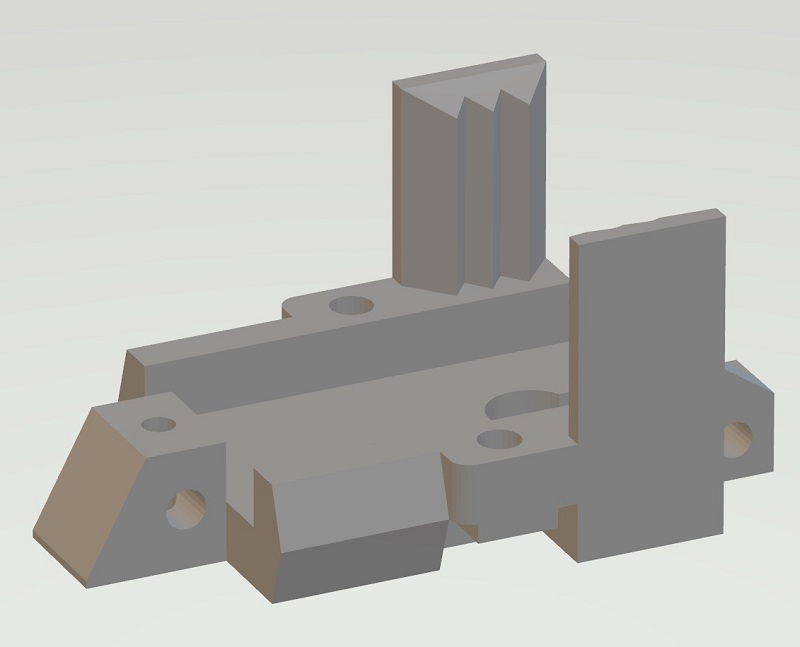 | 1 (x6) |
| joint_cross |
| 1 (x6) |
| joint_cross | 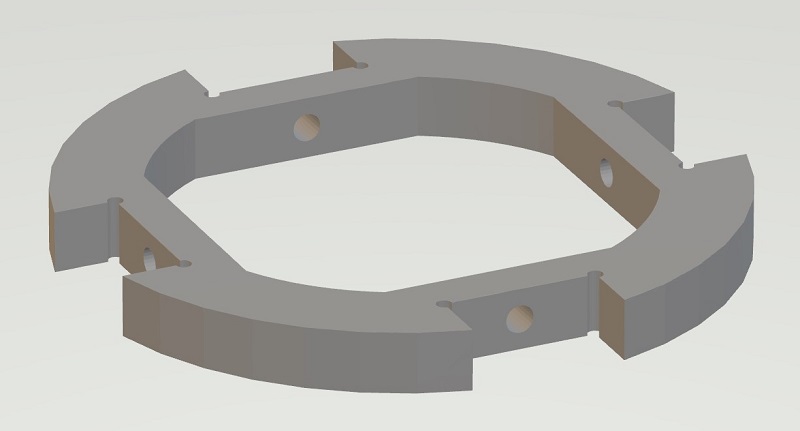 | 1 (x6) |
| joint_top |
| 1 (x6) |
| joint_top | 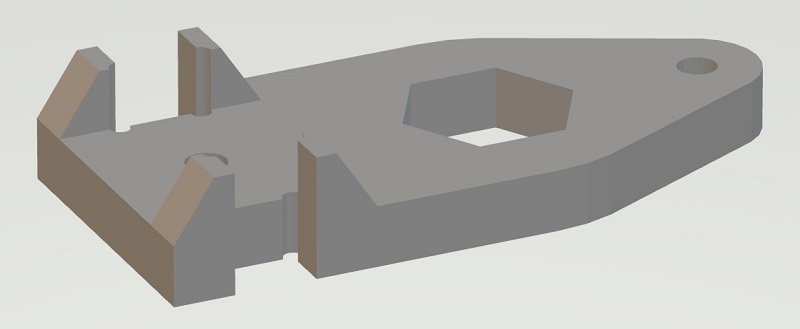 | 2 (x6) |
| joint_bottom |
| 2 (x6) |
| joint_bottom | 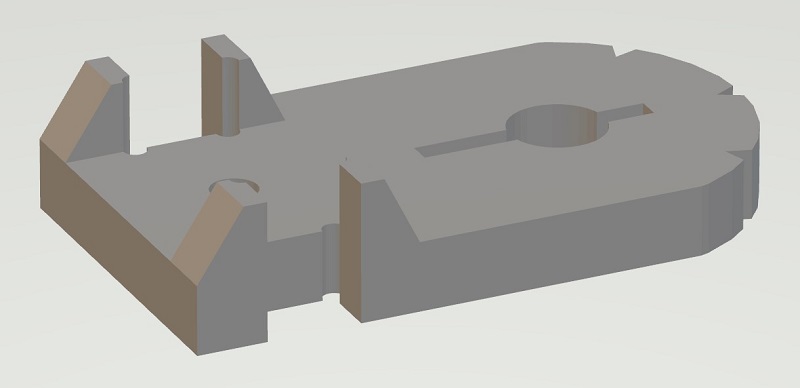 | 2 (x6) |
| leg_top |
| 2 (x6) |
| leg_top | 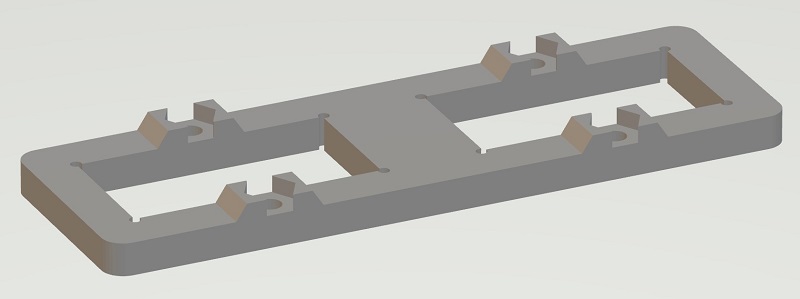 | 1 (x6) |
| let_bottom |
| 1 (x6) |
| let_bottom | 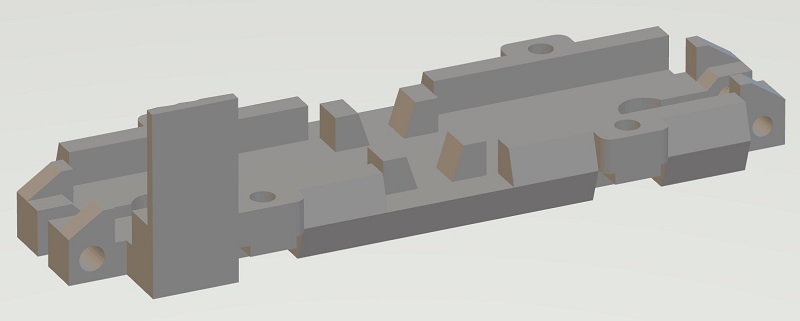 | 1 (x6) |
| foot_top |
| 1 (x6) |
| foot_top | 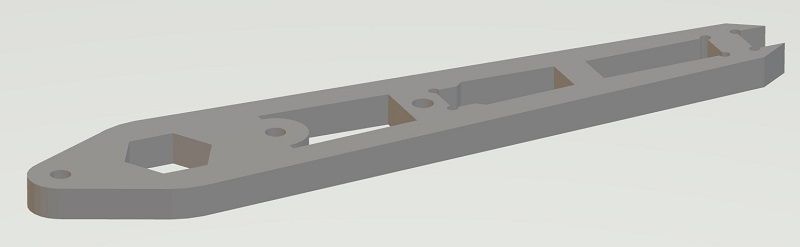 | 1 (x6) |
| foot_bottom |
| 1 (x6) |
| foot_bottom | 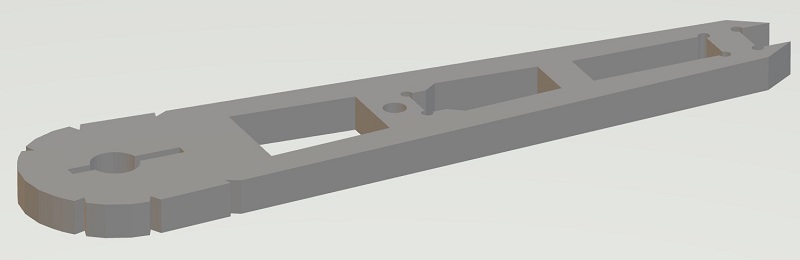 | 1 (x6) |
| foot_ground |
| 1 (x6) |
| foot_ground | 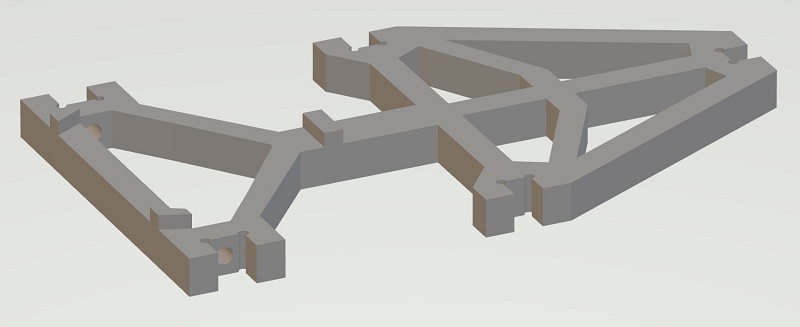 | 1 (x6) |
| foot_tip |
| 1 (x6) |
| foot_tip | 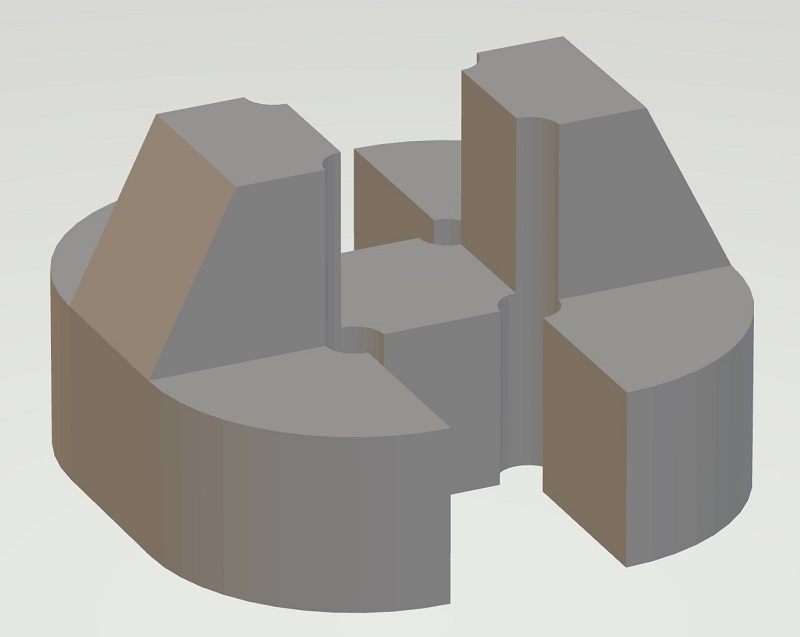 | 1 (x6) |
| servo_horn_j1j2 |
| 1 (x6) |
| servo_horn_j1j2 | 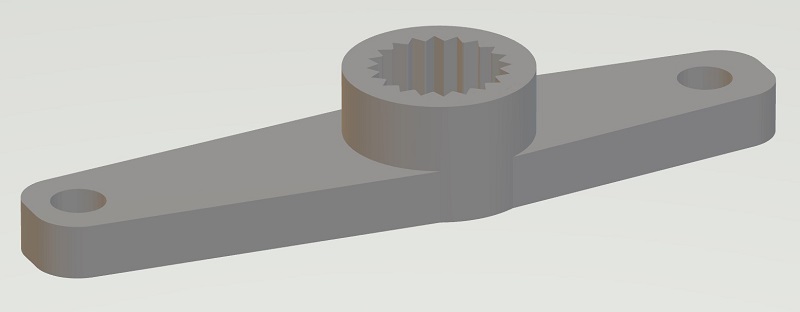 | 2 (x6) |
| servo_horn_j3 |
| 2 (x6) |
| servo_horn_j3 | 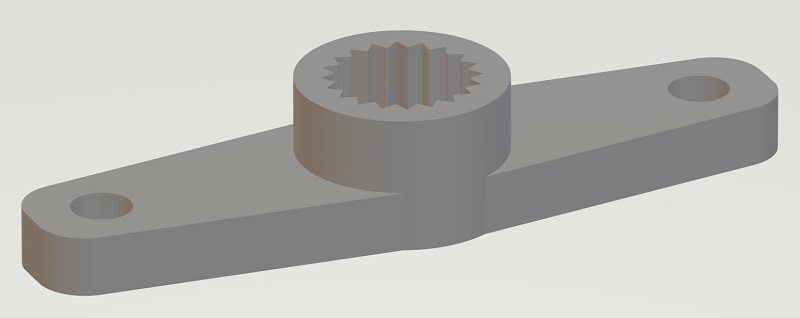 | 1 (x6) |
#### Others
| Name | Spec | Thumbnail | Required | Note |
| --------- | ------- | ---------------------------- | -------- | ------------------------------------------------- |
| Screw | M2 6mm | 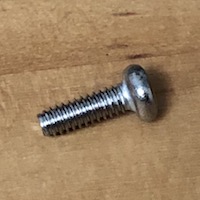 | 54 | Servo Arm: 1 x 18
| 1 (x6) |
#### Others
| Name | Spec | Thumbnail | Required | Note |
| --------- | ------- | ---------------------------- | -------- | ------------------------------------------------- |
| Screw | M2 6mm |  | 54 | Servo Arm: 1 x 18
Joint: 4 x 6
Thigh: 2 x 6 |
| Screw | M2 10mm |  | 24 | Thigh: 1 x 6
Pin lock: 1 x 18 |
| Screw | M2 30mm | 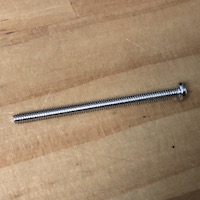 | 36 | Servo: 2 x 18 |
| Nuts | M2 | 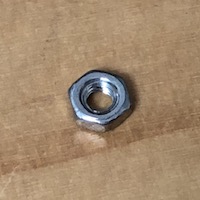 | 36 | Servo: 2 x 18 |
| Pin (304) | M4 6mm | 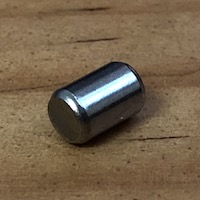 | 18 | Servo: 1 x 18 |
### Leg Assemble
#### Assembly video
 #### Exploded view
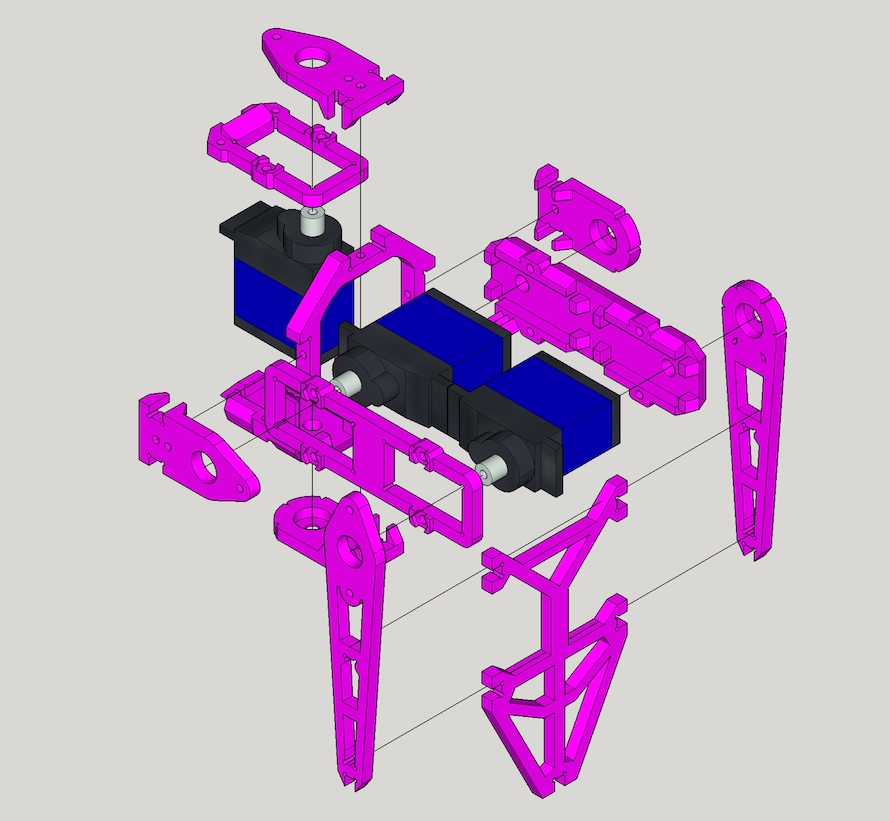 #### Detailed steps
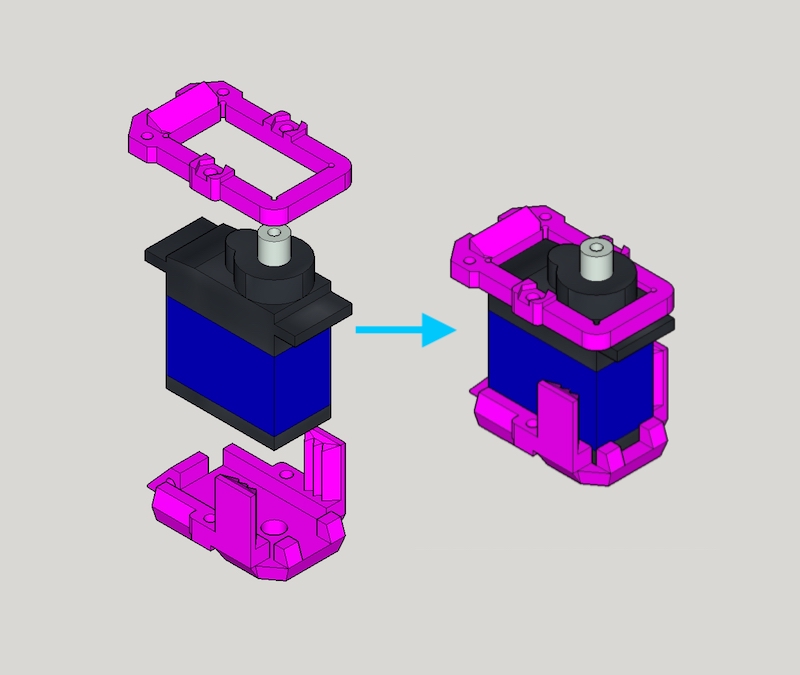
- **Step 1** - Combine `thigh_top`, `MG92B` and `thigh_bottom`, use M2x30mm screw and nut to secure them together.
#### Detailed steps
- **Step 1** - Combine `thigh_top`, `MG92B` and `thigh_bottom`, use M2x30mm screw and nut to secure them together.
 - **Step 2** - Grab one `joint_cross`, `joint_top` and `joint_bottom` and combine them
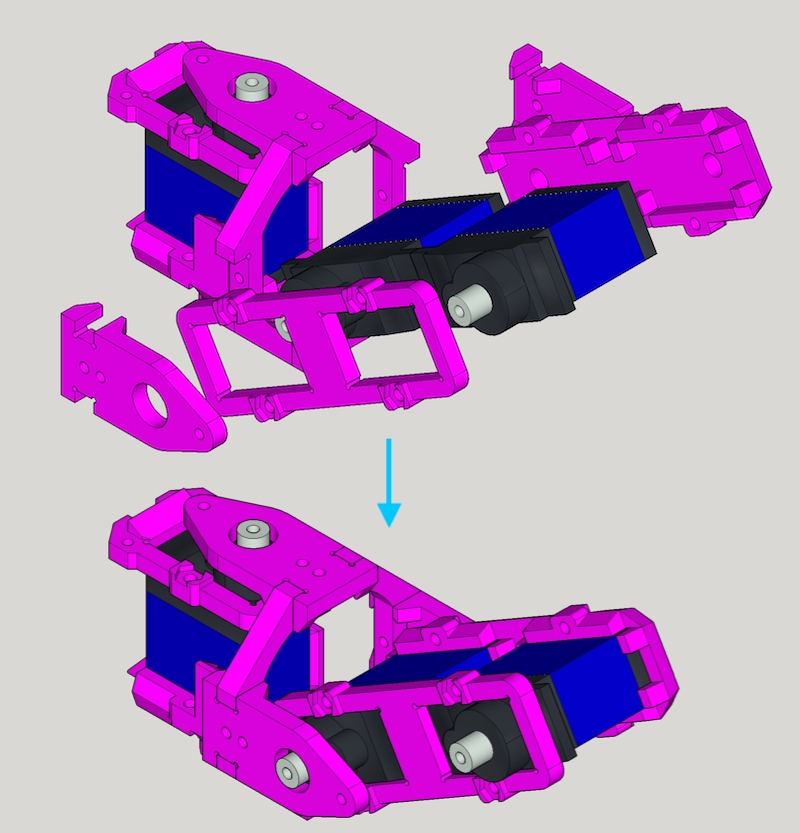
 - **Step 3** - First put 2 x `MG92B`, `leg_top` and `leg_bottom` together with M2x30mm screw and nut. Then attach `joint_top` and `joint_bottom` altogether
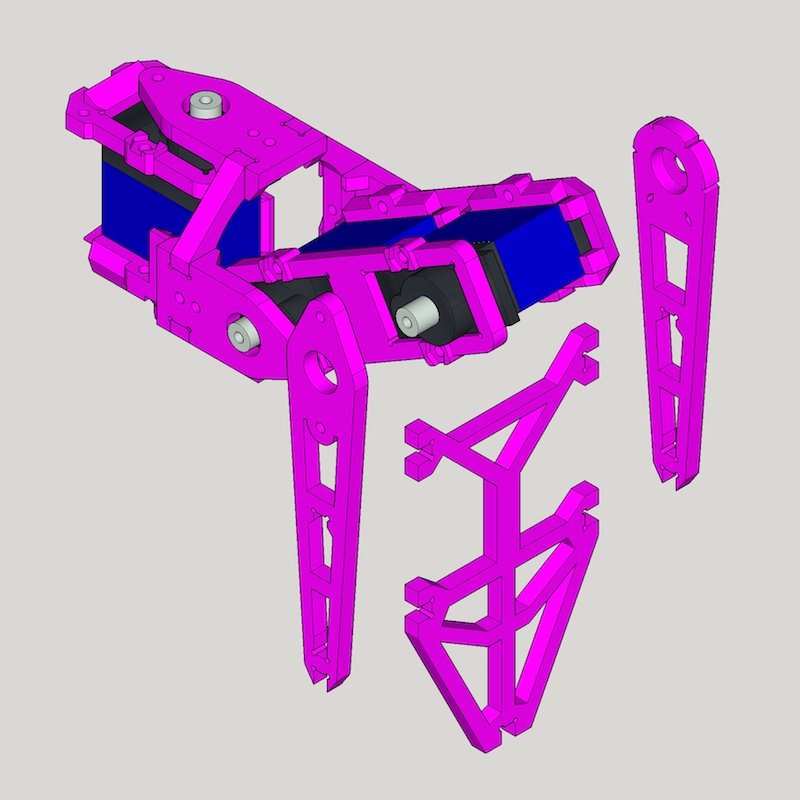
 - **Step 4** - Grab `foot_top`, `foot_bottom` and `foot_ground` (and `foot_top`) and assemble them.
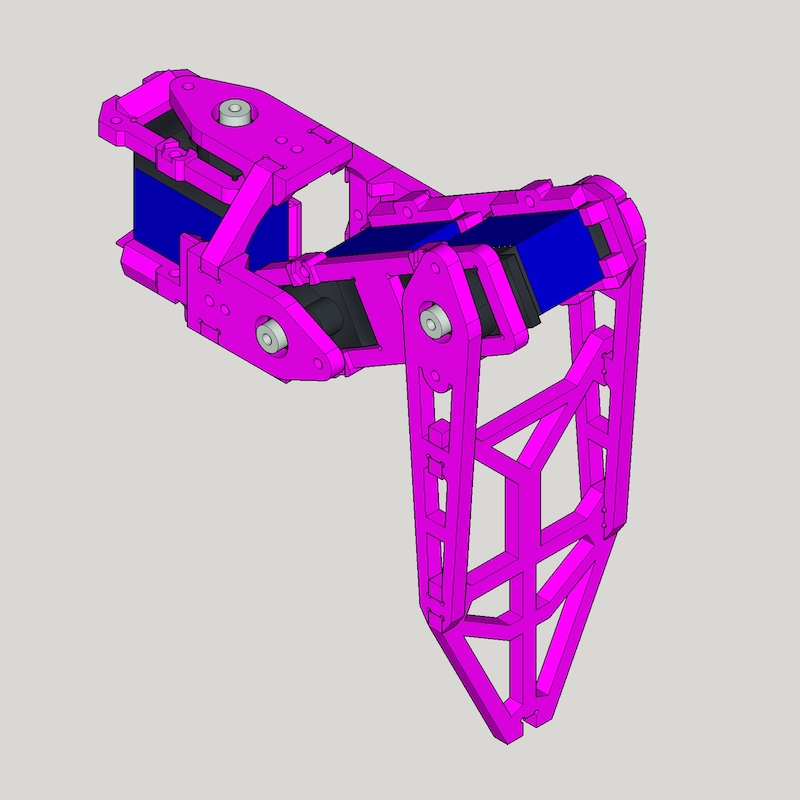
 - **Finish** - Great, you got 1 leg done, 5 more to go :)
 ## Electronics
### Bill of Materials (BOM)
| Name | Thumbnail | Required |
| -------------------------- | ---------------------------------------------------------------------- | -------- |
| Raspberry Pi Zero W or W 2 |
## Electronics
### Bill of Materials (BOM)
| Name | Thumbnail | Required |
| -------------------------- | ---------------------------------------------------------------------- | -------- |
| Raspberry Pi Zero W or W 2 | 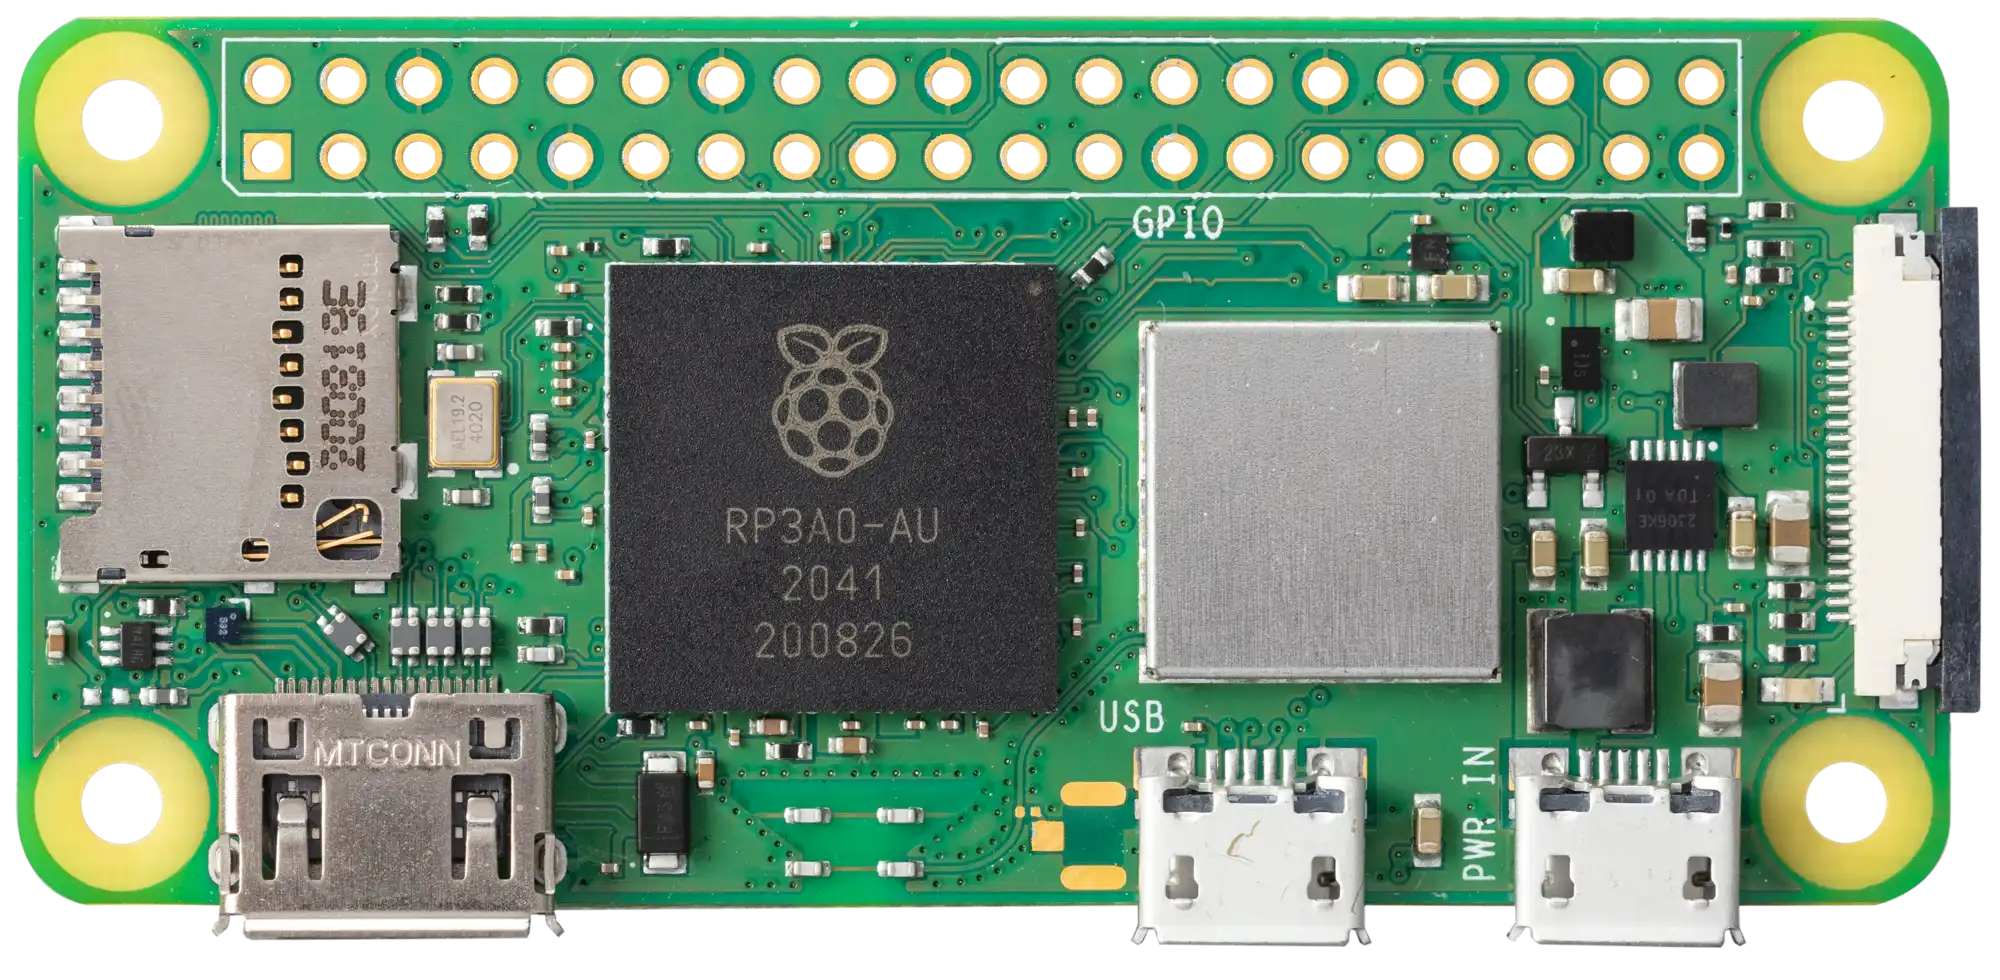 | 1 |
| PCA9685 motor driver |
| 1 |
| PCA9685 motor driver | 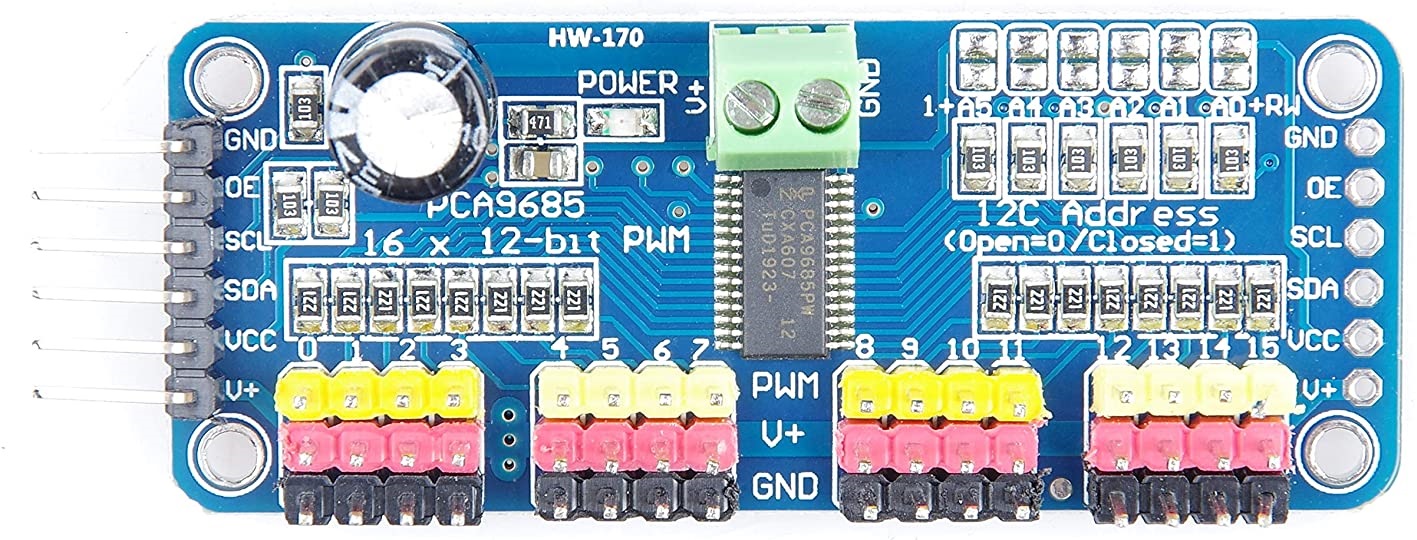 | 2 |
| XL4005 DC-DC step down |
| 2 |
| XL4005 DC-DC step down | 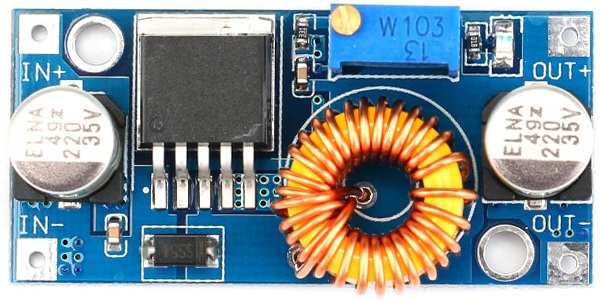 | 2 |
| Mini 360 DC-DC step down |
| 2 |
| Mini 360 DC-DC step down |  | 1 |
| Toggle switch |
| 1 |
| Toggle switch | 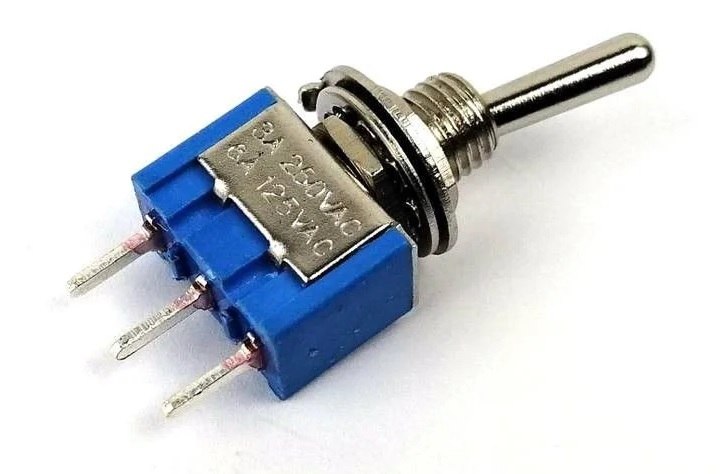 | 1 |
### Connection Diagram
| 1 |
### Connection Diagram
